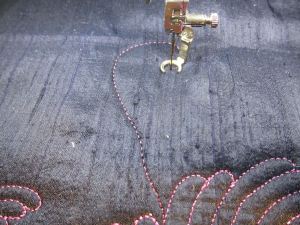
Getting started is quite simple. Pull the bobbin thread up and hold on while you get started stitching. I started stitching the feather base a crook or candy can shape.


As I was stitching the curve out the needle was knocking – meaning that the tip is bent – and I had to change as soon as I finished the base.

A bent tip will compromise the cloth so it had to go. Bad needle, bad needle! More to the point bad quilter for continuing to quilt with the needle in there. I kept thinking it’s only a few more stitches. Well it was only a few more stitches but I could have caused myself some serious damage to the quilt.

So here I am getting started once again. I’m using my favorite Batt Scooters.
The first step from here is to make the base loop. I stitch that base loop based on 1) the available space and 2) what I see coming up next. There’s another part of the center feather reaching over so I don’t want to extend too far.

just far enough away for space & interest


Next I start stitching just above and on a slight angle up over the loop. Because I’m stitching fairly narrow (Victorian style) feathers I don’t want to go too big or too far away from the first loop.
When I get near the top of the previous feather I’ll curve in, touch the previous feather, stitch one or two along before retracing the top of the curve and starting the next feather.

At this point I have to say just keep going and trust that this is all going to work out. I promise it will.

Make those practice pieces and play. Remember you have a seam ripper if you really don’t like it. In a day or two I’ll post the practice on paper session I did.
Happy Quilting!
Teri


Love that feather technique….it’s the one that works for me, too. Lovely stitching!!!!! The fabric is gorgeous and works so well with that thread.
Was thinking about doing some feather work on a quilt I’m doing but one of the borders is a silk fabric. I was wondering if you have any rules to follow doing FM quilting on silk. Do you use a lightweight stabilizer. on the back of the fabric. Just love everything you do. Ellen
I’ve found that basting well is essential. I spray baste with 505, spraying the batting. This stabilizes the silk enough to do whatever quilting I want without a problem
Thank you Teri for that info; was driving myself a little crazy since I’ve played around a little with silk but never in a large quilt. Hugs…